I have started and stopped this post probably about 10 times now. I just didn’t feel it was that interesting. But there probably isn’t a better time to capitalize on this post than this week, because of a certain few widely known bloggers, who should have known better, and had their websites go down with out any backups.
This post won't be as flashy as Robs method, but it has worked very well for my WordPress, MySQL, and Windows deployment for 2 and 1/2 years. So here is the original post.
This method of backing up your web server very cheaply has actually been deployed on this server since mid-2007, so it has been working flawlessly, with very little maintenance and work over the past 2 and 1/2 years. And it has saved my but once or twice.
Server Setup
Before I jump in to the specifics, this post is geared towards a WIMP (Windows, IIS, MySQL, and PHP) install, or more specifically a Windows WordPress install. Here are the tools that I am using to accomplish this:
- 7-zip (7-zip.org)
- MySQL (mysql.com)
- Windows 2003 or better
- Scheduled Tasks
- Command Terminal
- GoDaddy domain (godaddy.com)
- Remote Desktop Access
Make sure you install everything from above that you haven't already done so on your server.
GoDaddy Domain w/ Free FTP
The first thing you need to do is buy a from GoDaddy if you don’t already have one, and then venture over to setup your free hosting that came with your domain. With this hosting you will get an FTP account to access this hosting account. I am not going to cover this anymore, because if you need help GoDaddy has many resources that will help you get started.
Get your FTP setup with your username and password for the FTP access and put those aside you will need them for later.
Backup Batch File
From this point on we are going to get in to the real meat of the backup process. The first thing we are going to want to setup is the batch file that will run on the schedule task.
The first part of the batch file is the setup for the processing.
@echo OFF
CLS
Title Website Backup

@rem Date Configuration
for /f "tokens=1-4 delims=/ " %%a in ('date/t') do (
set weekday=%%a
set month=%%b
set day=%%c
set year=%%d
)

@rem Backup Configuration
set servername=localhost
set database=managedfusion coderjournal
set backupdir="C:websites"
set supportdir=%backupdir%_support
set databasedir=%backupdir%_db_backups
set ftpcommands=%supportdir%ftp-commands.txt
set logfile=%supportdir%backup.log
set zipfile=%backupdir%backup.%weekday%.7z
set sqlfile=%databasedir%backup.%weekday%.sql
set zip="C:program files7-Zip7z.exe"
set mysqldump="C:Program FilesMySQLMySQL Server 5.1binmysqldump.exe"
set mysqluser=root
set mysqlpassword=FlufflyBunnies1234

set start=%date% - %time%: Database Backup of %database% Started
A couple things that you are going to want to change right away are the database, backupdir, and mysqlpassword. (By the way I was that is not my real password.) Nothing really interesting here, I made this batch file very configurable, so that I could use it in future deployments. Another interesting setting you will want to look at is the sqlfile which has a special %weekday% command in it that will insert the day of the week. This means that if something goes wrong you will have the last week worth of data to look through.
The next thing we want to do is clean up any logs that where left around last time the process was run, and start the logging process for this run of the batch file.
@rem Remove Old Log
del /f /q %logfile%

@rem Start Logging
echo %start%
echo %start% >> %logfile%
The logging isn’t too detailed, just that the batch file started and stopped and how long it took. Next we are going to use a special program, that comes with MySQL, called mysqldump.exe, which can be used to dump the schema and the data in the databases.
@rem dump database. This is all one line
del %sqlfile%
%mysqldump% --user=%mysqluser% --password=%mysqlpassword% --comments --create-options --extended-insert --tz-utc --result-file=%sqlfile% --databases %database%
if not exist %sqlfile% goto FAIL_DUMP
This will dump the entire schema and data in to a SQL file that can be used to rebuild your entire database as of the time the backup was run if you ever needed to do so. After the database is backed up, which could take some time depending on the size of your database, it is now time to create an easily transferable file. Because you will have your entire database file, as well as your images, and anything else that is deployed on your website. To do this I choose to use 7-Zip, which has a very nice command line tool, to compact everything in to one easily transferred file over FTP.
@rem Zip up database
del %zipfile%
%zip% a -t7z -p%mysqlpassword% -mx=1 -mhe=on -x!*.7z -r -y %zipfile% %backupdir%*
if not exist %zipfile% goto FAIL_GZIP
I also used the MySQL password to secure the file, just as an extra added layer of protection. Next we are going to FTP our newly created zip file to our hosting previous created from GoDaddy. In Windows FTP can be done from the command line, but it takes an extra commands file, that feeds the FTP command line a list of commands to execute against the server. The code I am going to show you is part of the batch file.
@rem FTP archives offsite
ftp -n -s:%ftpcommands%
Very simple right. The next thing is the list of commands which sits in another file appropriately called ftp-commands.txt that sits right next to the batch file we have been creating.
open
myFTPhosting.com
user
myUSERaccount
FluffyBunnies1234
bin
put backup.Mon.7z
put backup.Tue.7z
put backup.Wed.7z
put backup.Thu.7z
put backup.Fri.7z
put backup.Sat.7z
put backup.Sun.7z
quit
You are going to want to change the following:
- Line 2: your domain name for the FTP hosting you setup above
- Line 3: your FTP username
- Line 4: your FTP password (still not my password I swear)
After you modify those lines save the file and we can continue with the batch file setup for the backup. The rest really doesn’t need much explaining, because it is just logging and error handling.
@REM All is well
GOTO SUCCESS

:FAIL_DUMP
SET message=%date% - %time%: Database Dump of %database% Failed
GOTO END
:FAIL_GZIP
SET message=%date% - %time%: Backup Compression of %database% Failed
GOTO END
:SUCCESS
SET message=%date% - %time%: Backup of %database% Completed Succesfully
GOTO END

:END
ECHO %message%
ECHO %message% >> %logfile%
Scheduling Your Backup
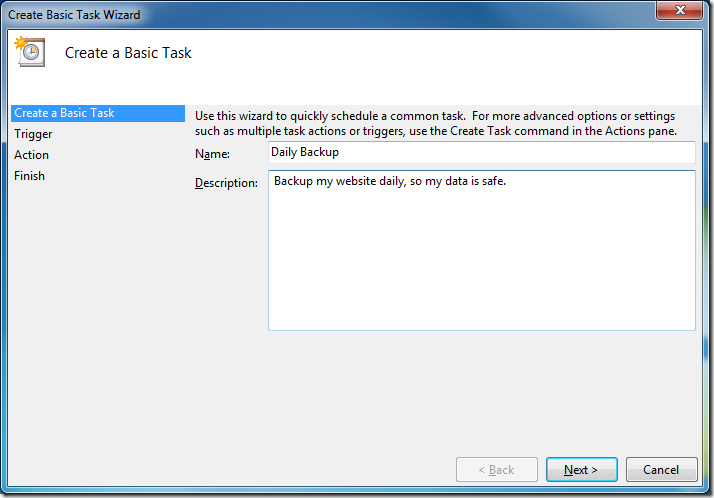
The next thing we need to do is setup a schedule for how often we want to run this batch file we have just created. Just open up the Task Scheduler and click Create Basic Task… to bring up the wizard window.
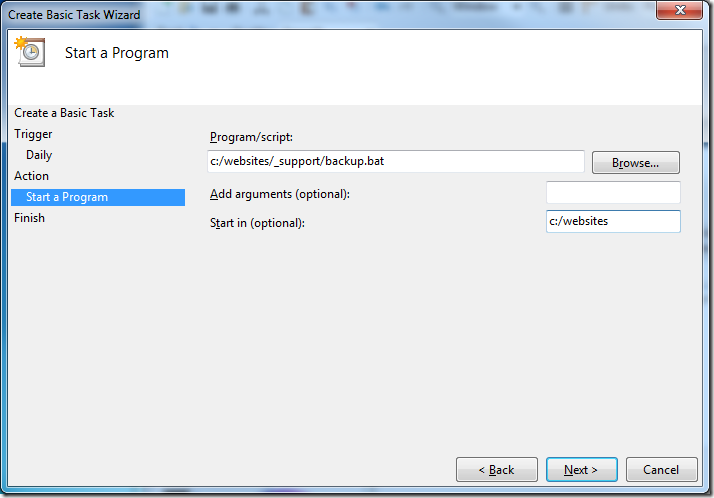
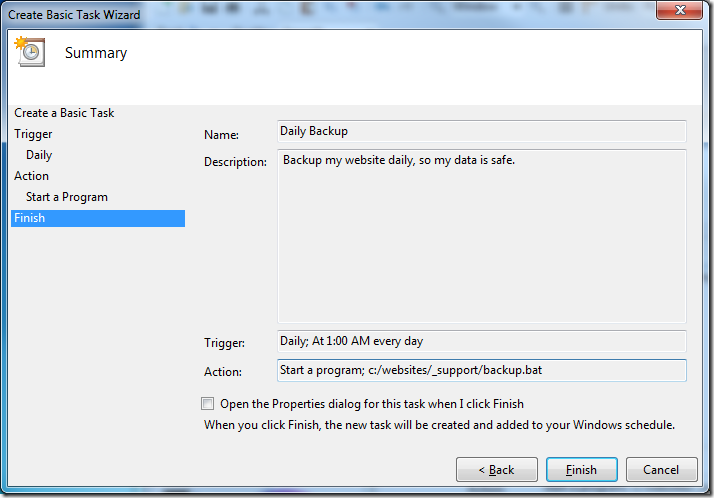
Just continue through the wizard and setup the settings how you want. I choose it to run daily at 1:00 AM.
Make sure to fill in the Start in field to be the root of your website, even though it is not the location of your batch file. This is because the batch file is setup from the perspective of that it will be running in the root of the website.
After you have finished this wizard kick it off once just to make sure everything is running fine.
Sit Back And Relax
You now have a daily backup of your website. So sit back and relax. If your server ever fails, you need to switch hosts, or reproduce the website on your local machine for some development. You have an easy backup of everything you need to get rolling in a relatively small amount of time. Plus as an added bonus you don’t have to lose sleep over not having any backups of your website that you have spent countless hours creating.
Like I said this process has been running with out problems since I started this blog 2 and 1/2 years ago. So you can rest assured that it will work for you, if you follow the steps above exactly as they are laid out.


